Posts

Command & Colors - War of the Roses

Image
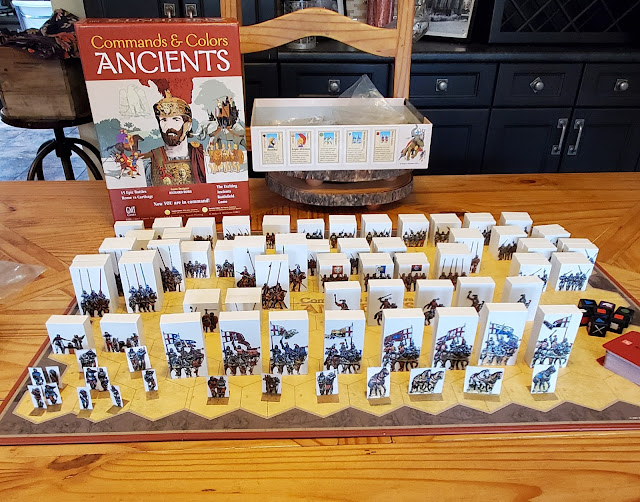
 After having played a playtest using the blocks I made I found I was not to happy with them. They just seem to big. Here is my set up for Blore Heath.  Lancastrians on the far side and the Yorkists on the near side.    I removed the two Heavy infantry cards from the C&C deck as the only forces we had on the field were Billmen (medium infantry), Longbowmen (light infantry) and Cavalry (medium cavalry).  To make the scenario a bit more historical I was going to have the "I am Sparticus" card a traitor card. When drawn the card would be played immediately (after round 2 maybe). The Yorkist would roll his command (5 dice) and all medium dice rolled would indicate how many units of the Lancastrian horse would turn traitor.  We didn't use that rule in the play test.  I am considering some other options. Either make bases for my paper troops and use them like that or to shrink the prints and mount them on proper C&C blocks.

Command & Colors - War of the Roses - Battle of Blore Heath - Sept 23rd, 1459

Image
 BrtishBattles.com has a ton of information regarding the War of the Roses. I used the website as my source material for my C&C Blore's Heath scenario. So let's see if those Lancastrian pretenders get smacked like they did historically... Here is our battlefield and the armies deployed for battle. The accounts indicate the Yorkists built up some defensive works and were on the defensive as they were outnumbered by the Lancastrians.  Crossing Wemberton Brook and assaulting the Yorkists position is going to be a tough go but with double the number of troops it may be possible.  I laid out the Command & Colors battlefield as follows; Yorkist Army Composition: 1 Commander - Richard Neville the Earl of Salisbury 1 Cavalry unit (Medium Cavalry) 2 Longbowmen units (Light Infantry) 8 Billmen units (Medium Infantry) The Yorkists defensive works are classified as a palisade Lancastrian Army Composition: 1   Commander - Lord Audley, Noblemen, veteran of the 100 yea...

Command & Colors - War of the Roses - Almost complete

Image
Over the last couple months I was able to get some work done on this project. I am almost finished. Although I can see always wanting to add a few more units to it (I just have to add some Pikemen)  I cut a ton of MDF blocks. After painting them I glued on some images from Peter Dennis's Battles of Britain, Wargame the War of the Roses book of paper soliders.    At the forefront are some casualty markers (Need them as only two blocks will be used to represent each unit instead of the C&C usual four blocks). I have 8 different Leaders, then I have some Mounted and Foot Knights, Billmen, Longbowmen, Crossbowmen, Handgunners, a couple Artillery pieces and even some Irish Kerns. A close up of some Livered Longbowmen Long live King Richard, Son of Yorke! I also completed some work on a Reference card for the different units. Although the images of the game board, dice and cards are from the Command & Colors Ancients set I plan to use the C&C Medieval ruleset. Time ...

Recent C&C Medieval thoughts

Image
My thoughts on creating new Medieval stickers for my Command & Colors game may have been solved.  I ordered this PDF and will be scaling these for use with Command & Colors.  Now to combine GMT's Medieval Command & Colors with Colombia Games Richard III Campaign system...

Onwards to Leonforte, July 21st, 1943

Image
The Loyal Edmonton Regiment's first taste of combat was the engagement 3 miles south of Piazza Armerina on July 16th, 1943. After having chased off the 2nd Battalion of the 104 Panzer Grenadier Regiment from that position, the Loyal Eddies were ready to advance on Piazza Armerina itself. Was it going to be heavily defended?  What was the enemies strength? Artillery fire from the Germans on the Canadian position was countered with counter battery fire and the German guns were silenced. By nightfall the Germans had vacated Piazza Armerina and the Eddies moved in. With 3rd Brigade pushing past the Eddies (who are with 2nd Brigade) in Piazza Armerina, the Eddies were able to take a bit of a breather before they were again called into action. Lieutentant Colonel R.M. Crowe and Major J.H.W. Pope - Commanding Officer and battalion second-in-command of The Royal Canadian Regiment, checking a map outside of Piazza Armerina on 17 Jul 1943. They were the only two RCR officers killed i...

AAR - Saturday afternoon game (Crossfire - Bocage scenario)

Image
An old friend of mine, who I haven't seen in a while, was able to come over to try his luck with Crossfire. We decided to play the 'Bocage' scenario from the 'Hit the Dirt' booklet for Crossfire. It's a great scenario as it covers hidden deployment, the use of snipers, off board mortars, tanks and anti-tank guns. Brian chose to play the British (I have no American miniatures) so I was the defending Germans. My view looking North towards the British edge of the map. My objective was to hold a line of sight on the road intersection by the time the clock ran out. Start time was 0600hrs game would end at 1100hrs, advancing 30 minutes on every role of 5+ on a D6. I had three advantages, hidden deployment, 2 minefields and 2 stretches of barbed wire.  The British advanced quickly on the West side of the road. Finding an open field (red chip) the Brit commander figured an ambush was imminent. He called up his Forward Observation Officers (FO) to give them a...

AAR: Pianzza Armerina, July 16th, 1943 (a Poor Bloody Infantry tabletop wargame)

Image
After the landings near Pachino on July 10th, 1943 the Second Canadian Brigade pushed North.  Canadians entering Modica  By noon on July 16th they were three miles south of Pianzza Armerina when a large explosion on the road halted their advance. At this point the Loyal Edmonton Regiment was in the lead. "C" Company had been riding on the sherman tanks of the Three Rivers Regiment in the vanguard. "C" Company dove for cover as they came under machine gun fire from the nearby slopes.  German MG position Brigadier J.C. Jefferson ordered "C" Company to take the slopes on the right side of the road and "A" Company was ordered to clear the left.  -------------------------------------------------------------------------------------------------------------------------- Our Poor Bloody Infantry (PBI) game takes place with "A" Company attempting to clear the left side of the roadway.  Here are our initial deployments ...